Integrating Microsoft Azure Document Intelligence Receipt Model with PeopleSoft
As the digital transformation wave continues to sweep across industries, leveraging AI and machine learning in enterprise applications has become increasingly pivotal. PeopleSoft, a robust enterprise resource planning (ERP) system, is well-equipped to adapt to these advancements. This post explores how to integrate Microsoft Azure Document Intelligence Receipt Model with PeopleSoft to demonstrate its capabilities in embracing AI solutions.
Please note, this is only to showcase how the integration can be done between Azure Document Intelligence AI services and PeopleSoft system.
Understanding the Azure Document Intelligence Receipt Model
Microsoft Azure Document Intelligence, formerly known as Form Recognizer, offers a Receipt Model that extracts information from receipts. This model uses AI to analyze and extract key data, such as merchant name, transaction date, total amount, and more, from receipts in various formats.
Step-by-Step Guide to Integration
Prerequisites
Microsoft Azure Account: Ensure you have an active Azure account with access to the Document Intelligence service.
PeopleSoft Environment: A working instance of PeopleSoft with access to customization capabilities.
API Integration Knowledge: Basic understanding of API integration within PeopleSoft.
Step 1: Set Up the Azure Document Intelligence Receipt Model
Have a free trial account in MS Azure.
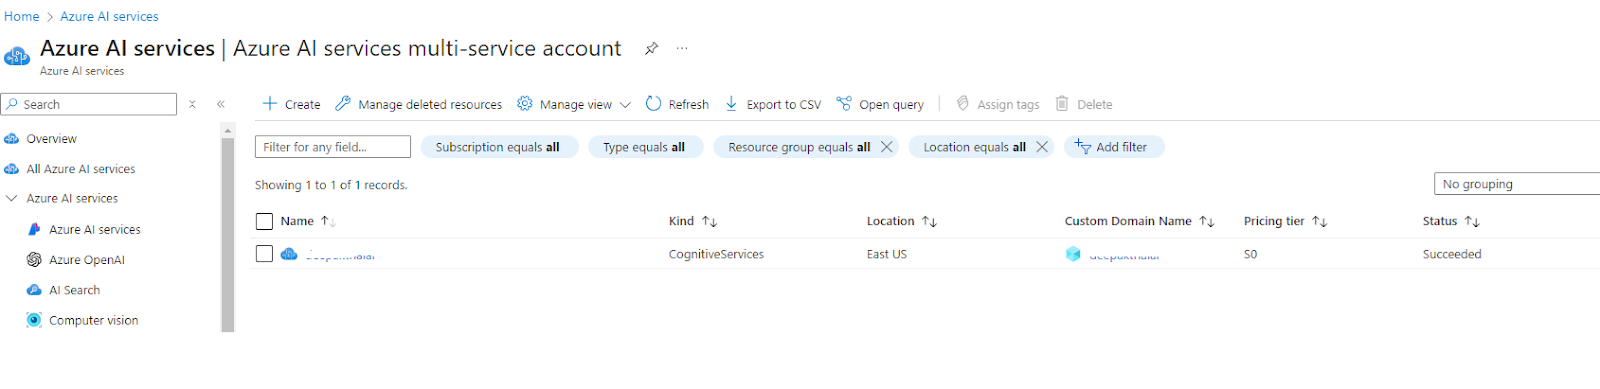
Create a Azure AI services multi service account

.
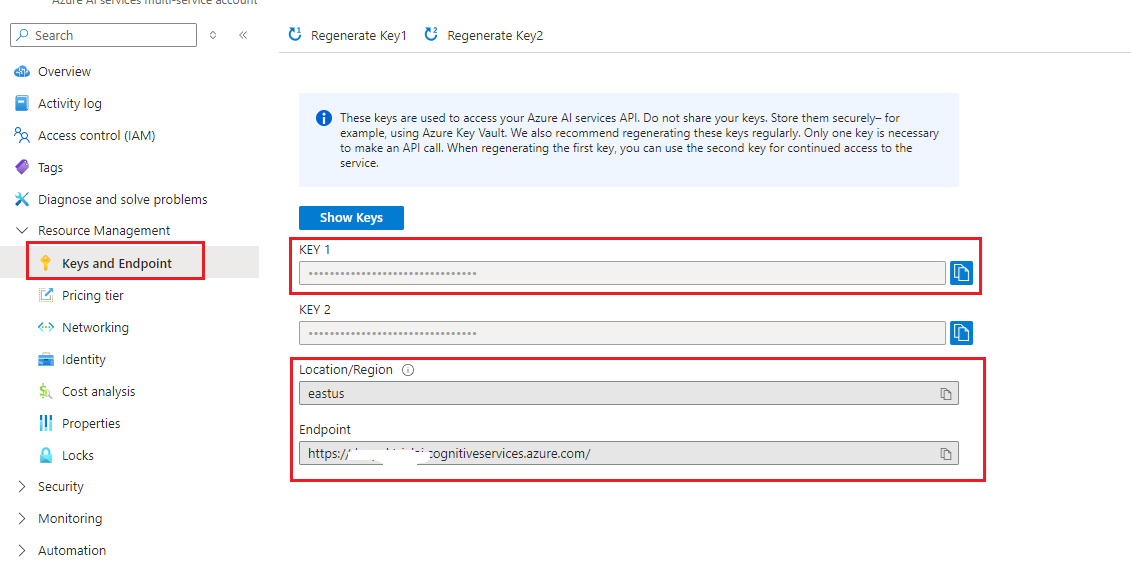
Obtain API Keys and Endpoint: After creating the resource, navigate to the 'Keys and Endpoint' section to get the API keys and endpoint URL required for making API calls.
Imp - Please make a note of the KEY1 and Endpoint as these will be used throughout this POC.
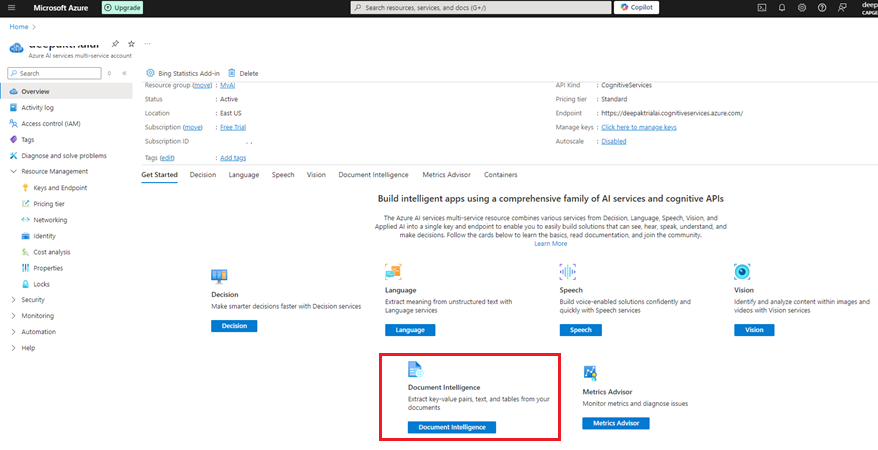
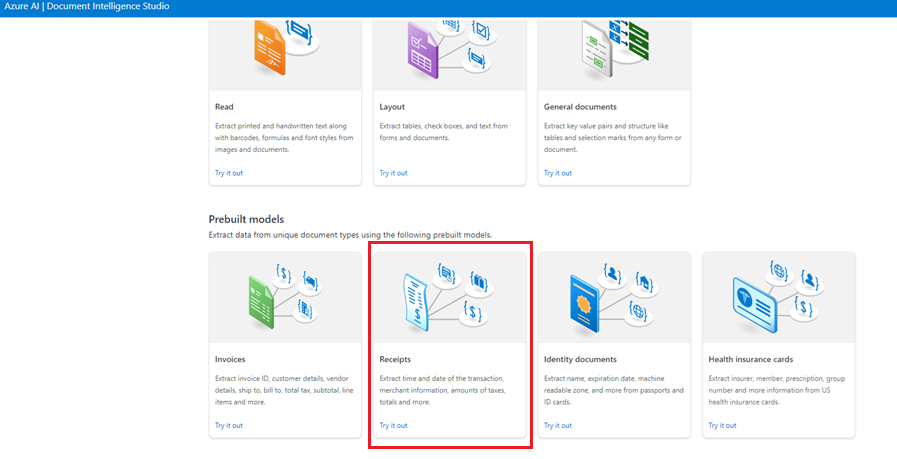
Step 2: Test in Microsoft Azure Document Intelligence Studio
Access Document Intelligence Studio: Navigate to the Azure Document Intelligence Studio from the Azure portal.
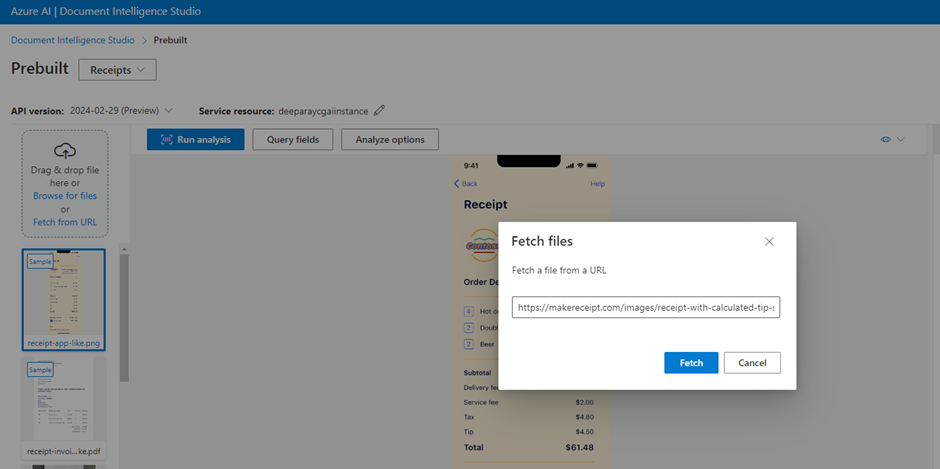
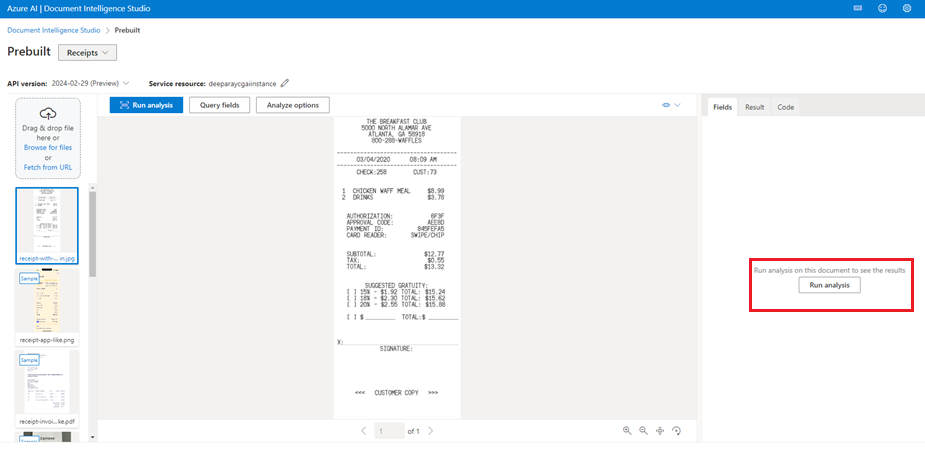
Upload Receipt for Testing: Use the interface to upload a sample receipt image or PDF.
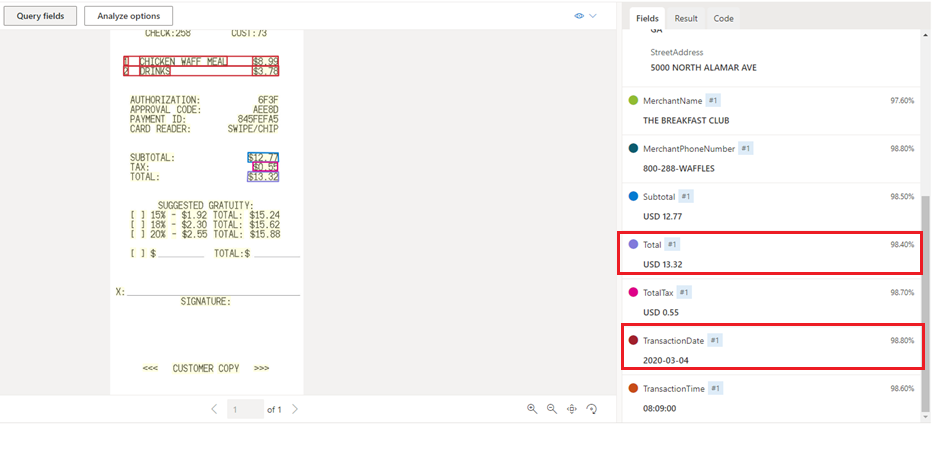
Analyze Receipt: Once uploaded, the model will process the receipt and display the extracted information. Verify the accuracy of the extracted data.
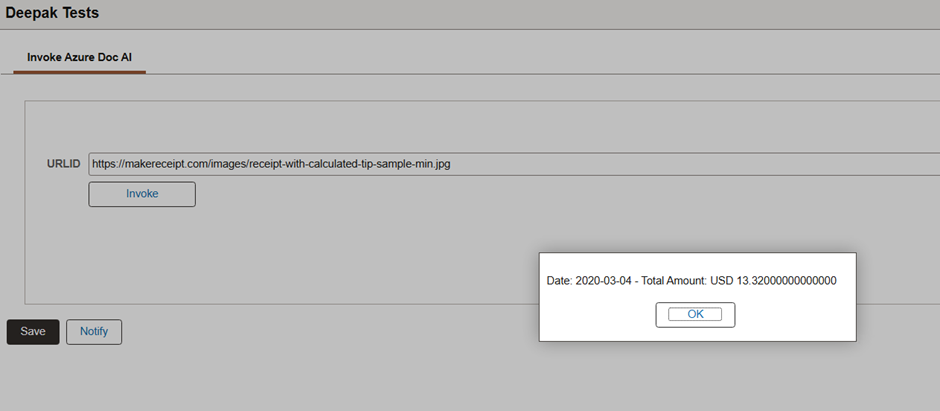
Testing via direct image url - https://makereceipt.com/images/receipt-with-calculated-tip-sample-min.jpg
Results in PeopleSoft

Testing Via directly uploading a file:
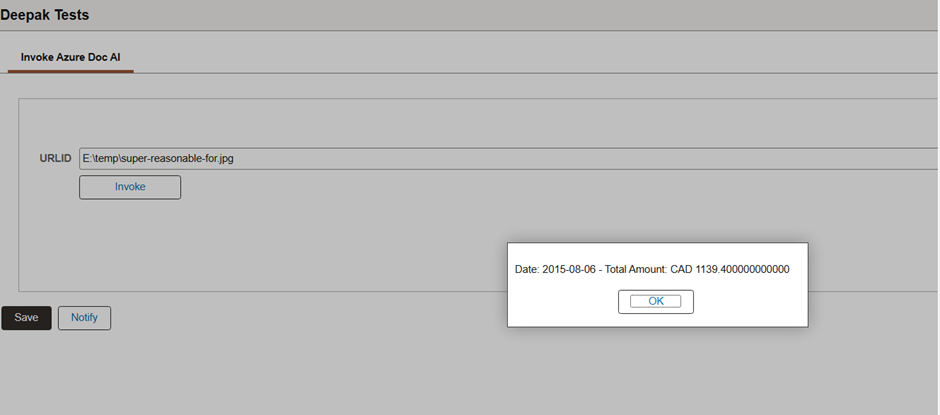
Using the url - https://media-cdn.tripadvisor.com/media/photo-s/08/93/33/eb/super-reasonable-for.jpg
Save it locally on your machine and then upload in Document Intelligence Studio

Results from PeopleSoft
Step 3: Test the API using Postman
Before using the REST API’s of Receipt Model, first test it in Postman.
The complete documentation can be found here.
Set Up Postman: Download and install Postman if you haven't already.
Create a New Request: In Postman, create a new HTTP POST request.
Set Request URL: Use the endpoint URL from the Azure portal (e.g.,
https://<your-end-point>.cognitiveservices.azure.com/documentintelligence/documentModels/prebuilt-receipt:analyze?api-version=2024-02-29-preview
Set Headers: Add the following headers:
Ocp-Apim-Subscription-Key: Your subscription key from the Azure portal.
Content-Type: application/json
Body: In the body section, select ‘raw’' and enter the url of the image. In case you are uploading a file, then it should be a base64 string.


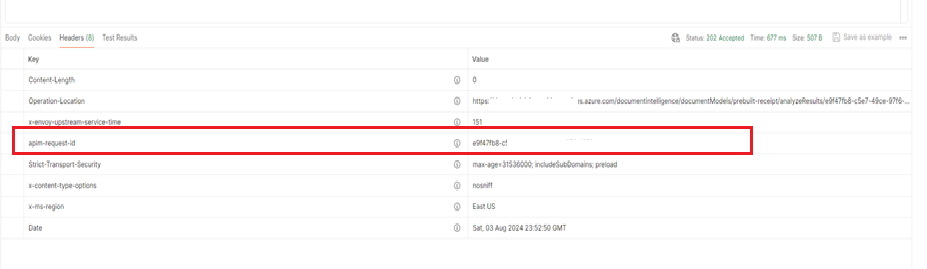
Send Request: Click 'Send' to make the API call.
Review Response Headers: Examine the Response headers and look for the parameter apim-request-id. This will be used in the next GET request to get the actual results.
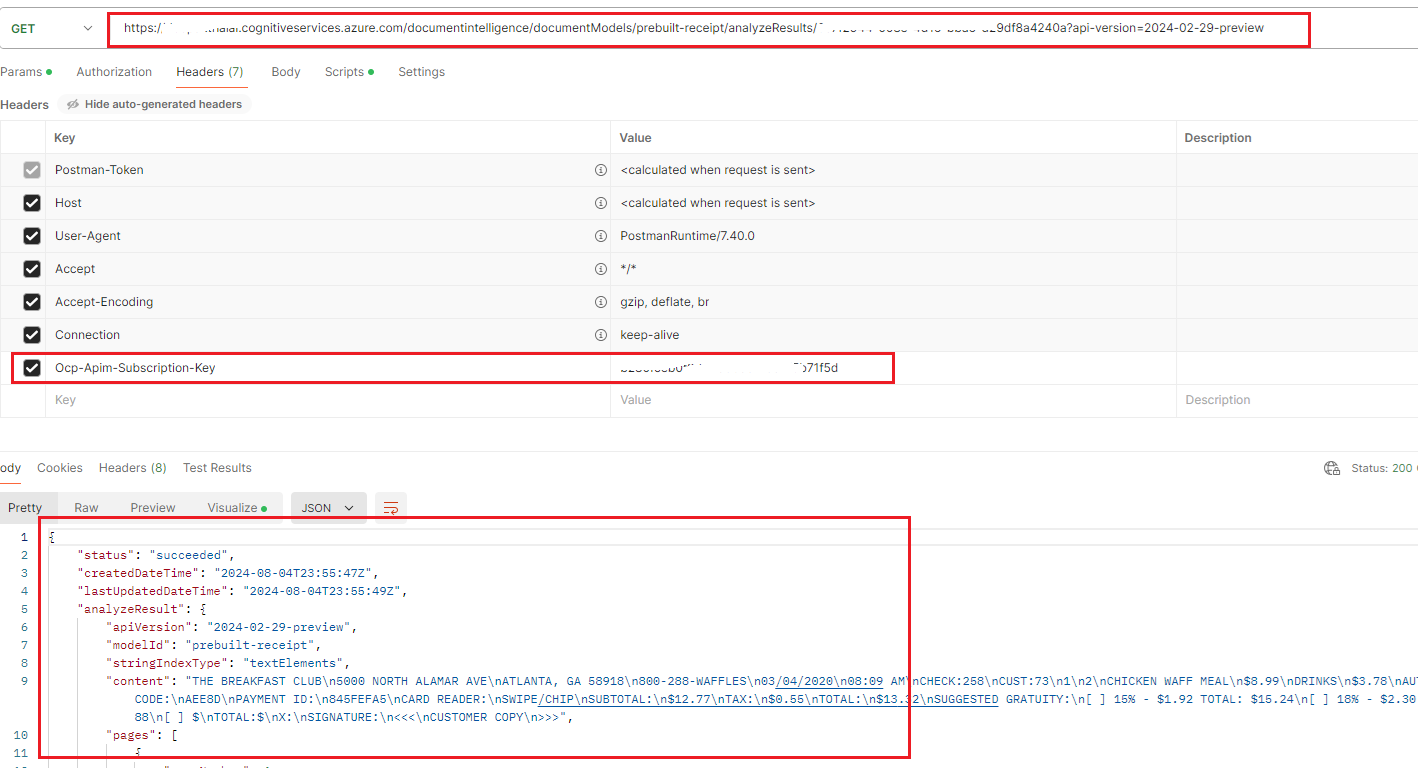
Now open another tab in Postman and enter the below url
https://<your-custom-endpoint>/documentintelligence/documentModels/prebuilt-receipt/analyzeResults/<apim-request-id>?api-version=2024-02-29-preview
Set the Ocp-Apim-Subscription-Key in the Request header and click Send.
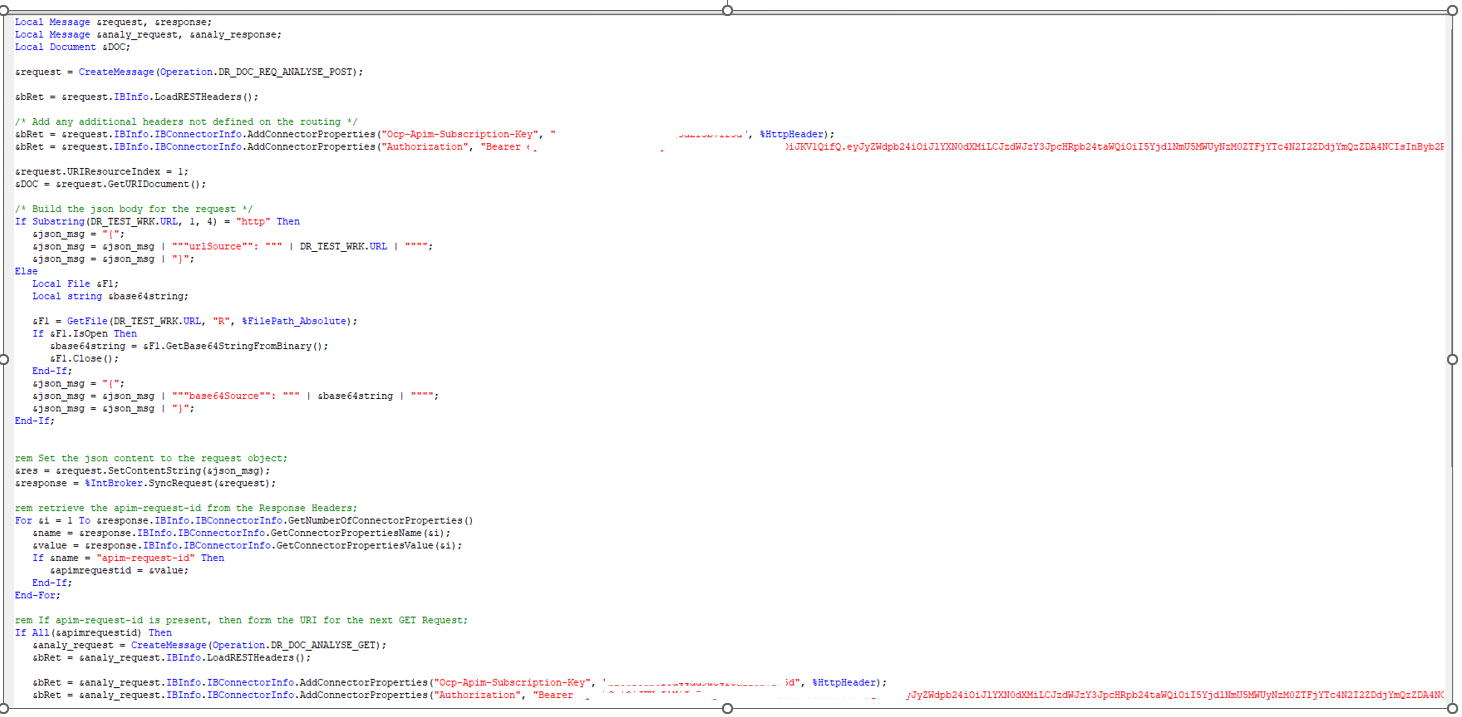
Step 4: Configure PeopleSoft for API Integration
Ensure that PeopleSoft Integration Broker is correctly set.
Create a REST consumer Service having wo Service Operations -
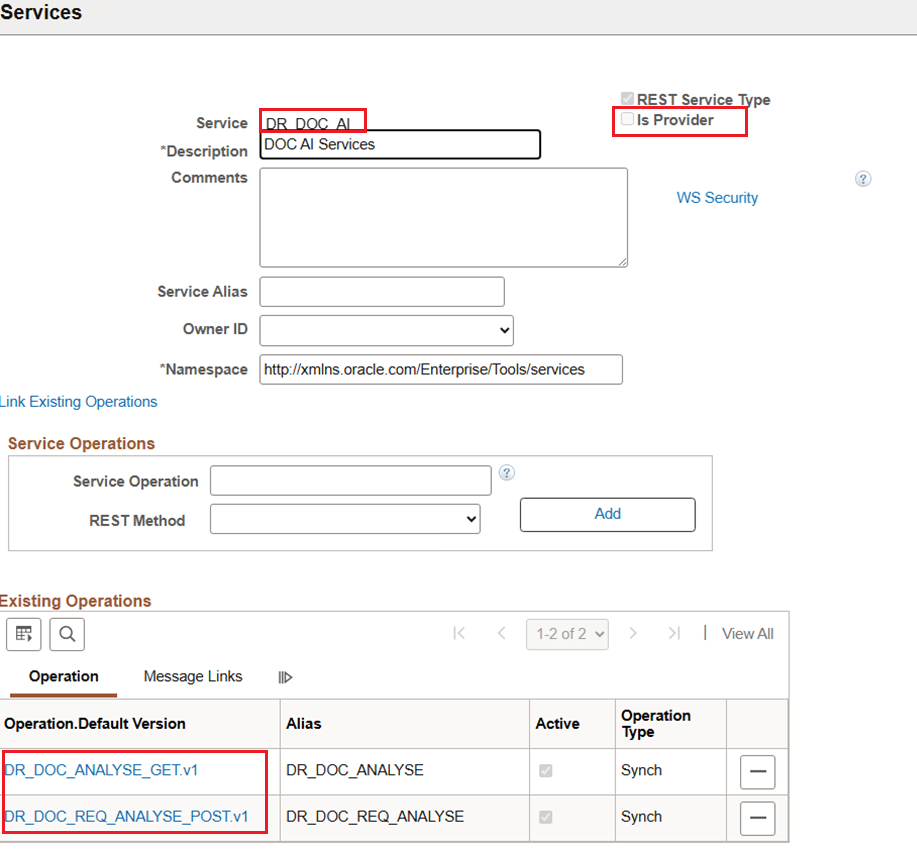
POST Service Operation to Post the Request
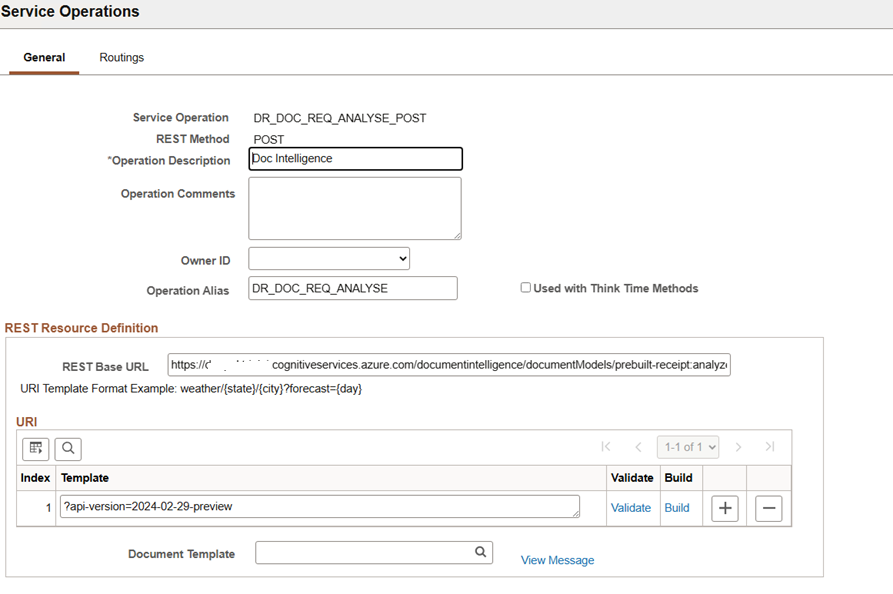
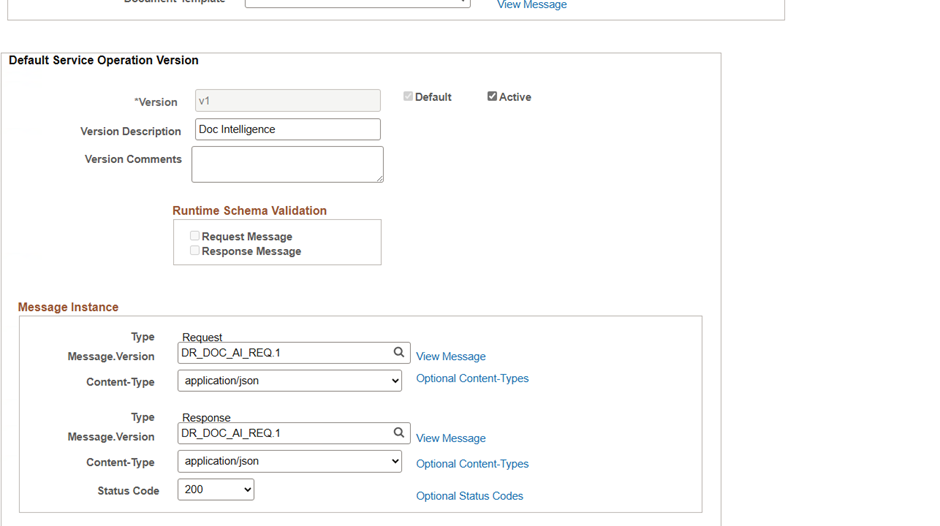
Enter the REST base url as
https://<your end point>/documentintelligence/documentModels/prebuilt-receipt:analyze
And in template - ?api-version=2024-02-29-preview
GET Service Operation
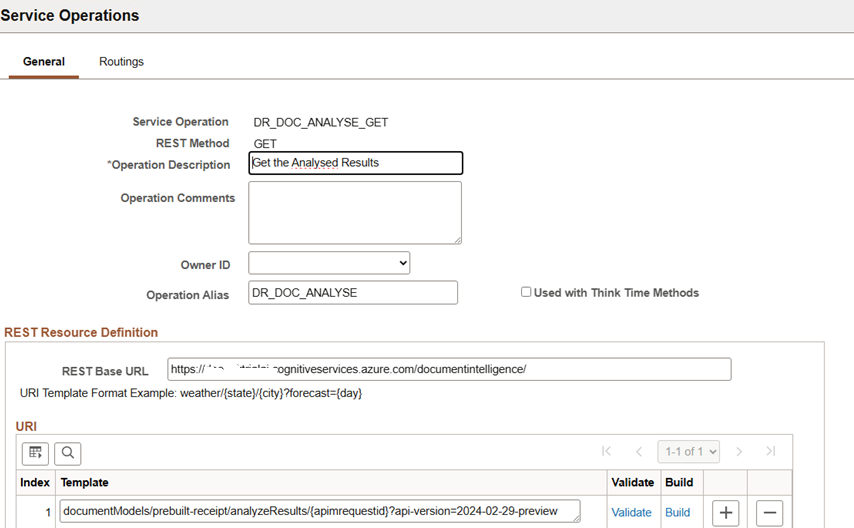
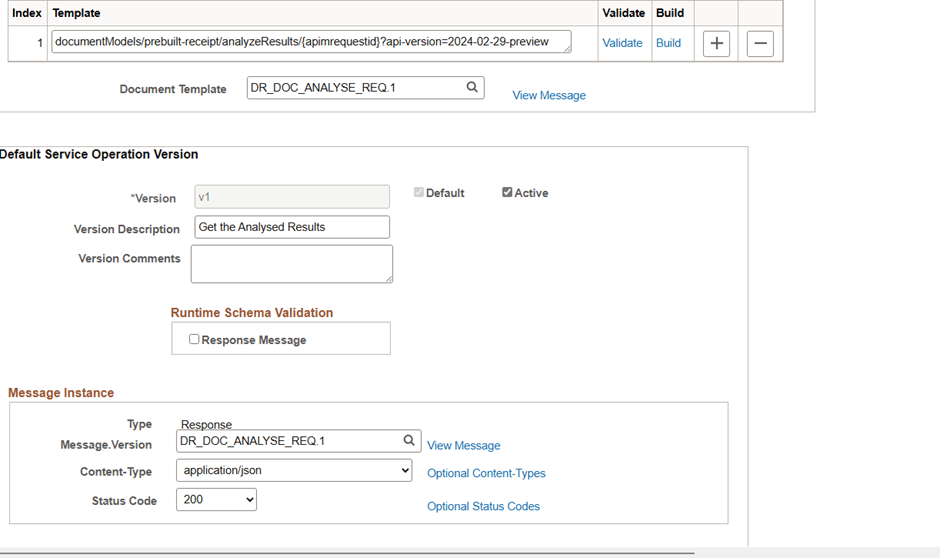
Enter the REST base URL as - https://<endpoint URL>/documentintelligence/
In Index template - documentModels/prebuilt-receipt/analyzeResults/{apimrequestid}?api-version=2024-02-29-preview
Step 5: Generate Bearer Token for Authorisation to Doc Intelligence REST API’s
This can be done programmatically, but for this POC I have generated it from Postman and used it in PeopleCode.
URL - https://<your azure region>.api.cognitive.microsoft.com/sts/v1.0/issueToken
In the request header, pass the content type, APIM Subscription key and region.

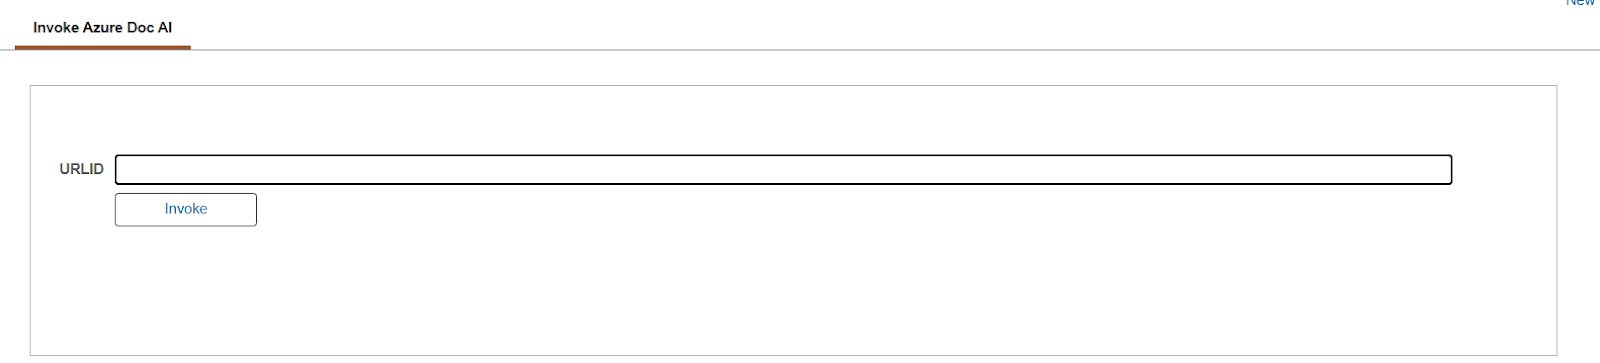
Step 6: Page Design and PeopleCode
Create a Simple page - to enter a URL or path to the image and a button to invoke the logic.
The code to parse the JSON and retrieve the result is from ChatGPT with little modification to it.
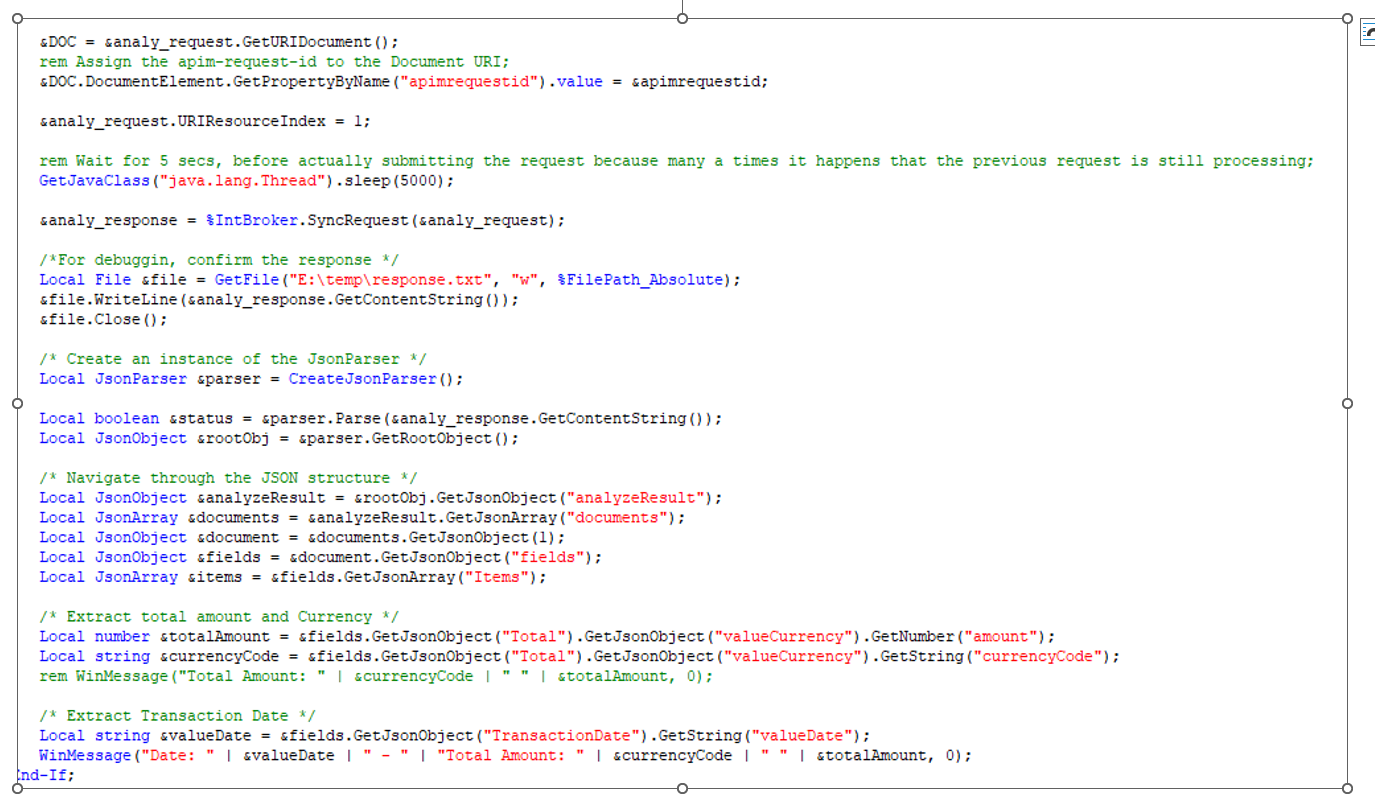
Complete PeopleCode can be found here.
Results
Using the image URL directly - (https://makereceipt.com/images/receipt-with-calculated-tip-sample-min.jpg)
Using File Upload and converting into base64string. Image used - https://media-cdn.tripadvisor.com/media/photo-s/08/93/33/eb/super-reasonable-for.jpg

Conclusion
Integrating Microsoft Azure Document Intelligence Receipt Model with PeopleSoft is a powerful example of how ERP systems can leverage AI to enhance operational efficiency. By automating receipt data extraction and entry, organizations can significantly reduce manual workloads, minimize errors, and streamline financial processes. Similar Document Services are provided by other providers like GCP, OCI etc. As long as they are exposed as API’s I think they can be effectively used in any ERP application.


